
If you are familiar with
Linux
you have probably heard of
Slackware.
It's the oldest surviving Linux distribution,
and over the years it has earned a reputation as an ultra conservative stable and crude simple system.
Rumors of its demise are greatly exaggerated:
Both the current and stable branch of Slackware has received daily updates in their
changelog
for years.
(as of this writing for instance,
Slackware includes Firefox version 140.3.1esr,
the latest extended support release)
It's just that a stable release hasn't been pushed in a while.
Finally though,
on February 2 2022 Slackware 15.0 was released after nearly 6 years of development.
We will take a closer look at this recent edition of Slackware,
and I think you'll be pleasantly surprised.
We will not cover all the generic aspects of using a Linux desktop however,
since that is covered all over the place on the web,
instead our focus will be on basic system administration,
and package management in particular,
which is quite different in Slackware then what you might be used to.
PS: This is a long and tedious article, if you want the quick version just read the Installation and Desktop section and the Package Management section. Have Fun!
Well, yes and no. Take this 2 second test to see if you have what it takes to become a Slacker: To enable sudo access uncomment the %wheel line in /etc/sudoers. Do you understand what that means? Would you be able to do it? If so you have what it takes, if not you may be in for a rough ride...
Despite it's reputation, installing Slackware and firing up a desktop is done in a matter of minutes. In recent years binary repos and user friendly package managers with dependency resolution have also become available, so you can choose to use Slackware much like a run of the mill desktop distro, even though the defaults assume a much more manual approach. Slackware strives to follow the KISS principle/UNIX philosophy (a loosing uphill battle if there ever was one!), meaning that upstream applications are altered as little as possible, and the distro tries very hard to stay out of your way. This may seem crude, even unwelcoming to users who are accustomed to more user-friendly distros, with layers upon layers of patches, custom configurations and assorted utilities woven deeply into the mesh of things, all in a valiant, but ultimately futile, attempt to hide the fact that Linux is inconsistent, ugly and difficult. Slackware makes no such attempt whatsoever. It may seem counter intuitive, but in the long run this approach is arguably easier.
For one "user-friendliness" is often at the surface level. Like throwing a blanket over a pile of garbage, it doesn't actually solve the underlying problem (looking at you Systemd). When things break the sysadmin needs to understand how the system works. Kelly Johnson, the lead engineer at the Lockheed Skunk Works who coined the acronym KISS (Keep it simple stupid), famously handed a team of engineers a handful of tools, challenging them to design a jet aircraft that must be repairable by an average mechanic in the field under combat conditions using only these tools. Seasoned sysadmins, whether they are Slackers or not, understand what he was talking about. Because every major distro has their own custom tooling, learning the ropes in one of them, will not necessarily help you out in another. Finally, since most big distros patch upstream applications liberally, it can be very hard to debug problems; Does the bug originate from upstream, from the distro patch or is it some local customization that are screwing things up? The fun really begins when a forum suggests one solution, the distro documents another, and the upstream developers agree with neither.
So even if Slackware lacks makeup and has a somewhat steep learning curve at the onset, once you fix problems that arise, they tend to remain solved. The problems you encounter in Slackware will also be Linux problems, and the tools you use to solve them are Linux tools. So once you have become comfortable with this old timer, you have essentially become a distro agnostic Linux expert. Why even BSD will not throw you any big surprises! Like LFS, Slackware provides a fascinating learning experience, but it also gives you a fully functional desktop and server at the onset.
PS: We will not talk about how you can use Slackware as a server (or "in the cloud" if you prefer), but if you're interested in that topic, I suggest "Episode 1" of Alien Bob's 7 part blog about cloud services in Slackware.
Because Slackware avoids making custom changes to upstream software you often don't need distro specific documentation. Are you having trouble with Firefox? Go to the Firefox website. Are you having trouble with VLC? Go to the VLC website. Are you having issues with LibreOffice? Go to the LibreOffice website. If you are having trouble with a program in Slackware, talk to the developers of that program. The version shipped with this distro is delivered as the authors intended.
A pro tip when Googling a Slackware problem: search for "Linux my problem..." or even "BSD my problem...",* not "Slackware my problem...", since Slackware users are few but application problems are often similar across distros. The semi official Slackware forum is LinuxQuestions.org, many of the Slackware developers hang out there and will answer your questions to the best of their ability. An excellent Linux resource is the Arch Linux Wiki, although written for Arch Linux, many pointers here are relevant for all distros. There are Slackware mailing lists, but they are not much used.
Yet another channel for support is IRC (Yes, the Linux folks still use Internet Relay Chat!). IRC is an informal, noisy and rude place, but it will sometimes give you a quick solution to a quick problem. On libera, you can usually find a channel that's specific to your needs. For instance if you were having trouble with the above programs you could go to: #firefox, #videolan, or #libreoffice. Other channels of interest are #linux and #slackware* If you are unfamiliar with IRC, go to the Hexchat website, and follow the instructions. If you want to use the command line, irssi is a fine alternative:
$ irssi
[(status)] /network add <mynickname>
[(status)] /server add -ssl -auto -network libera irc.libera.chat 6697
[(status)] /connect libera
# if your nickname is already taken, you need another one:
[(status)] /nick <mynewnick>
[(status)] /msg nickserv register <mynewnick> <myemail@example.com>
# read your email and follow the instructions,
# afterwards you can auto authenticate your user:
[(status)] /server add -autosendcmd "/^msg nickserv ident <mypassword> libera
# restart irssi:
[(status)] /quit
$ irssi
[(status)] /join #slackware
[##slackware] Hi folks!
As a last resort you could pull up your sleeves and get a book. Scary I know, but it's the only way to really learn! There is a Slackware book, but it's very dated. The FreeBSD Handbook is another excellent source of information, even though many of the details do not apply directly to Linux. There are also a number of commercial books for Linux. A good starting point would be the Linux Bible from Wiley. O'Reilly has also a huge range of books on any number of Linux topics. You can buy these books at Amazon and other places.
I am not going to walk you through every single detail of the Slackware installation, just read the text carefully and go with the defaults unless you have a good reason not to. But I will give you a few hints: You need to partition your hard drive before you run the setup installer program, I recommend using cfdisk to do this (or you can partition your hard disk from another operating systems first). A single Linux partition will often suffice these days, but it doesn't hurt to add a swap partition as well (4-8 Gb should be ample). If you do not understand what "partition" means, do yourself a favor and choose a different Linux distribution. During the network configuration stage of the installer, choose Network Manager. When asked which desktop to use I recommend KDE if you have the horsepower, Xfce if you don't. Lastly, if you want to boot the system using grub, skip lilo/elilo during installation. Once setup is done, choose shell, not reboot. chroot into your fresh installation and install grub manually. How the heck do I do that?!? Find out (or just use lilo).
Update: The upcomming release of Slackware will use grub as its boot loader, and lilo will be dropped (who says Slackware isn't keeping up with the times!) Aside from having a boot loader that's actually maintained, you no longer need to manually install the boot loader every time the kernel is updated. Upgrading from Slackware 15.0 to current may render your machine unbootable due to these changes, to fix that you can boot up the machine using the installation DVD and do the following: (PS: The example assumes that /boot is in sda2, and that you are using Slackware current, which doesn't use a traditional initrd)
# mount /dev/sda2 /mnt
# mount -t proc proc /mnt/proc
# mount --rbind /dev /mnt/dev
# mount --rbind /sys /mnt/sys
# mount --rbind /run /mnt/run
# chroot /mnt /bin/bash

# grub-install --recheck /dev/sda
# grub-mkconfig -o /boot/grub/grub.cfg
# exit

# reboot
Digression: (ignore this) Slackware also ships with a 3rd boot loader, syslinux, which the install DVD actually uses to boot the computer during the installation phase. In rare cases syslinux can actually be a real life saver. On one occasion I needed to put Slackware 15.0 on a Dell Inspiron 8600 from 2003. The BIOS on this old relic was anything but forgiving. To have any hope of booting at all I needed to create a <1 Gb ext2 /boot partition as the first and only bootable entry in a classic DOS/MBR partitioning scheme using fdisk -c=dos. (for this legacy BIOS our /boot partition must begin at sector 63 exactly) I opted to use syslinux as the boot loader since I know it can work on this PC. (since Alpine booted just fine) So skipping lilo during installation, I exited once setup was finished an chose shell:
# chroot /mnt /bin/bash
# mkdir /boot/syslinux
# cat <<eof > /boot/syslinux/syslinux.cfg
> default linux
> prompt 0
> timeout 0
>
> label linux
    > linux /vmlinuz
    > append root=/dev/sda3 ro forcepae
> eof
# extlinux --install /boot/syslinux
# dd if=/usr/share/syslinux/mbr.bin of=/dev/sda
# exit
# reboot
Don't blindly copy paste this example! In my setup / is sda3, but your setup might be different. (note that the kernel is loaded relative to the partition we are booting from; so /boot/vmlinuz if we are booting from /, but /vmlinuz if we are booting from /boot) We also boot the default OS non-interactively to side step a hairy hardware issue; the syslinux graphical boot menu will hang the system. Lastly, the forcepae kernel parameter is also a non-standard requirement for this particular PITA laptop. (other old hardware might require noapic and noacpi - but don't add such parameters unless you need them!) Although this digression probably isn't useful to you, I suppose there is a certain lesson here; Given a little know how, you can put Slackware on anything! (rest assured, the headache decreases with newer hardware) PS: Like grub, we also don't need to manually reinstall syslinux after a kernel update, as long as it points to a generic link like /boot/vmlinuz.

Booting into your new system will disappoint you, it's all text! Don't Panic! Just run startx and you will be greeted by a friendly desktop. Clicking around should get you internet access. You will find all kinds of useful, and not so useful, applications in the menu. However, the only user on this system seems to be root. And lot's of nifty programs, such as LibreOffice, VLC, Steam and whatnot, are missing, but there's no package manager! What gives!?!
It's time for some configurations. And lets be honest, this is where Slackware becomes challenging. But with a little bit of know-how you should do fine.
PS: It should be noted that you already have a very complete and capable operating system at this point! Since Slackware doesn't have an official repository of additional applications, the default installation is intended to be as complete as possible. "Complete" however is a relative term. Some might feel that a Linux box without Lynx is incomplete, some that a desktop without Chrome is lacking, the Slackware developers belong to the first group of people.
KDE has graphical tools for managing users and groups, but we will walk you through the command line approach. Add a regular user to your system with the adduser command. Go with the defaults, but when asked about "Additional UNIX groups" hit the up arrow key, it will fill in some recommended groups, and type wheel (it should read: : audio cdrom floppy input lp netdev plugdev power scanner video wheel). Once the user setup is done, give him sudo privileges by running visudo, type /# %wheel/, then hit x (to uncomment the line, it should read: %wheel ALL=(ALL:ALL) ALL), and type :wq to save and exit. Any user in the wheel group should now be authorized to do anything with sudo. If you forgot to add your user to the wheel group, you can do so later with: usermod -a -G wheel <myuser>
During installation you were asked to set up your keyboard layout. However, this only applies to the console (the text-based interface), if you start a graphical interface (ei. "desktop") it uses the default us layout. You can click around in KDE or Xfce to set a different keyboard layout, but that will not adjust the X defaults (so the login manager will still use a us keyboard). As an example, let's change the X defaults from a standard us keyboard, to a us keyboard with the dvorak layout and a right Alt compose key; You need to write an X config file, (eg. nano /etc/X11/xorg.conf.d/20-keyboard.conf) with the following content:
Section "InputClass"
	Identifier "system-keyboard"
	Option "XkbLayout" "us"
	Option "XkbVariant" "dvorak"
	Option "XkbOptions" "compose:ralt"
EndSection
If you have multiple monitors, you may run into a similar issue. KDE/Xfce will let you set up your monitors however you want, but these settings do not apply to the default X configuration (the login manager may have a wrong layout). For instance, on my setup I have two screens, LVDS-1 and VGA-1 (check with xrandr from within a desktop). I want LVDS-1 to be my primary monitor, to the left of VGA-1, and I want both screens to have the maximum available resolution. To specify that as the X defaults, I need to write another file, nano /etc/X11/xorg.conf.d/10-screen.conf:
Section "Monitor"
	Identifier "HDMI-1"
	Option     "LeftOf"  "VGA-1"
	Option     "Primary" "true"
	Option     "PreferredMode" "auto"
EndSection

Section "Monitor"
	Identifier "VGA-1"
	Option     "PreferredMode" "auto"
EndSection
Why all of this mess, can't KDE/Xfce do this for me?!? No, they can't. User programs, such as desktops, are not allowed to fiddle with system files. As for the X display server, it knows nothing about KDE/Xfce. It is possible to write tools that integrate these things smoothly, and many distros do, but this isn't really how "Linux" works. It is ugly yes, but at least Slackware teaches you to deal with this reality.
PS: Slackware 15.0 does come with Wayland if you prefer that over X (as far as inconsistencies are concerned it adds nicely to the mess).
You may also have noticed a difference between the shell in your text based environment and the desktop. The text based shell will highlight directories and links with different colors, it prints a humorous welcome message and has a decent prompt, but when you open up a terminal in your graphical desktop it has none of these things... Why? The systems default shell settings is in /etc/profile, and this file is read when you log in to a text based environment. (by the way, if you want to disable the "humorous" welcome messages, run chmod -x /etc/profile.d/bsd-games-login-fortune.sh) A graphical terminal however does not read this file, instead it reads $HOME/.bashrc.
The solution? Simple: Add source /etc/profile to your $HOME/.bashrc. But why do you need separate shell configurations for the graphical interface and the text-based interface?!? This is one of those ugly Linux (actually UNIX) inconsistencies that Slackware makes no effort to hide. It may be annoying at first when you encounter such difficulties, but trust me, you will be glad later when a colleague messes around in his ~/.bashrc on the companies Ubuntu server, but nothing happens after the ssh connection is reloaded... Poor sod didn't know that those instructions should go in ~/.profile. With experience you realize that Pat wasn't being a dope when he just stood there idly with a smug smile and watched you struggle, he was being a wise instructor, teaching you how to fish instead of handing you one.
By default the lilo boot loader waits patiently for 2 minutes before booting the first choice. This is a bit excessive and you may want to reduce the timeout in /etc/lilo.conf. If you are only running Slackware on this system its probably better to simply comment out the prompt line, this will make the boot loader run the first entry directly. When you are done editing this file, run the lilo command (as root) to install the new boot loader.
PS: Whenever you install a new kernel, you need to reinstall the boot loader, as we did above! We'll talk more about this directly, but beware that Slackware expects the sysadmin to know such things! (as mentioned in the Update above though, in the upcomming and current versions of Slackware, you don't need to worry about this)
The init system in Slackware is blissfully simple. All the available services are just shell scripts located in /etc/rc.d, the files that have executable permission will be run at startup, those that don't, won't. So enable a service by chmod +x /etc/rc.d/rc.some_service and disable by chmod -x. This takes effect after a reboot. If you need to start/stop/restart a daemon without rebooting, run the corresponding script with that argument, eg. /etc/rc.d/rc.some_service stop. Go ahead and read some of these scripts if you're curious, most of them are short and simple enough to understand. Lastly if you need to add custom commands to your startup, then add them to /etc/rc.d/rc.local.
As you can see Slackware boots into a textual interface by default. You can manually start a graphical interface with the startx command. The desktop used is the default you choose during installation, you can change this later with xwmconfig. You probably want to boot into a graphical interface by default though; you can do so by editing /etc/inittab and changing the line id:3:initdefault: to id:4:initdefault: Why isn't this the default in Slackware?!? Again, Slackware doesn't presume how you want to use your computer. Besides, it is a sensible default; enabling graphical login on a desktop is simple, disabling it on a headless server, or a broken desktop, may not be.
Rumors would have you believe that Slackware doesn't have a package manager. It does; it just hasn't got a graphical package manager, or dependency resolution, or a repo... See the distinction? Don't worry though, unofficially it has all of that. The semi-official 3rd party repository of community packages is SlackBuilds.org. This repo is in source form (although SlackOnly.com provides binaries), and the semi-official front end for it, sbopkg, does not resolve dependencies by default. The repository contains nearly 10,000 packages, which is small compared to the likes of Debian or Arch, but not totally insignificant (note that this number would be closer to ~20,000 packages in Debian terms, since sources can often be compiled into multiple binary packages).
Confusingly, there are a number of different routes to set up a 3rd party repository with dependency resolution on Slackware. sbotools and slpkg are advanced alternative front ends to SlackBuilds.org, and other repositories. You can look into that if you like, but I think it's a good idea to get a solid grasp of the basics first. For beginners, my recommendation is to install sbopkg, set it up to handle dependencies, then use it to install flatpak. The distro agnostic Flathub repository will pull in thousands of additional packages, and you now have two very practical ways of adding software. One for native Slackware packages, and one for distro agnostic packages. (you'll find docker too in SlackBuilds.org) After downloading sbopkg from sbopkg.org, you can:
$ su -                 # log in as root
# installpkg /home/myuser/Downloads/sbopkg-*.tgz
# vi /etc/slackpkg/blacklist    # add these lines:
[0-9]+_SBo             # allow SlackBuild.org packages
[0-9]+_wsr             # allow the sbopkg package
# sqg -a               # build dependency queues (takes a while!)
# sbopkg -i flatpak    # build the queue for flatpak
# exit                 # log out as root
$ flatpak --user remote-add flathub \
> https://flathub.org/repo/flathub.flatpakrepo
$ flatpak --user search chrome
Name      Description                   Application ID    ...
Google... The browser built to be yo... com.google.Chrome ...
...
$ flatpak --user install com.google.Chrome
$ flatpak --user list
Name      Application ID    ...
Google    com.google.Chrome ...
...
$ flatpak --user run com.google.Chrome
bwrap: Can't mount proc on /newroot/proc: Operation not permitted
error: ldconfig failed, exit status 256
Hm, seems the container setup utility, bwrap, doesn't have the necessary privileges. We'll need to fix that:
$ su -                 # log in as root again
# chown root:root /usr/bin/bwrap
# chmod u+s /usr/bin/bwrap
# exit                 # now it should work
$ flatpak --user run com.google.Chrome
$ alias chrome="flatpak --user run com.google.Chrome"
$ chrome               # convenient shortcut
$ echo alias chrome="flatpak --user run com.google.Chrome" \
> >> ~/.bashrc         # make it permanent
$ flatpak --user update
$ flatpak --user uninstall com.google.Chrome
$ flatpak --user uninstall --unused
There are advantages and disadvantages to using flatpaks. Since the flatpaks are containerized, they are arguably more secure, but slower. In theory, it adds more complexity to an already messy situation, since you need to manage this software ecosystem in addition to native Slackware packages. Depending on your needs though, it might simplify things in practice. In any event, Flathub.org is a binary repo, and it's flatpak front end handles dependencies, so it's a convenient tool to have.
Of course, most AppImages will also run just fine on Slackware. After downloading the AppImage for Endless Sky for instance, you can:
$ chmod +x Endless_Sky-*.AppImage
$ ./Endless_Sky-*.AppImage
$ alias endless="cd $HOME/apps && ./Endless_Sky-*.AppImage"
For many users, Flathub/AppImages in addition to the plethora of packages that Slackware already ships with, should be ample for everyday needs. But it's helpful to have an understanding of how packages are handled natively on Slackware. The next sections discusses these topics, but if you're bored, you can go ahead and skip to the end.
A Slackware package (usually a .txz file) is actually just a tar archive which unpacks its contents into the root filetree. It also includes an install directory that contains a slack-desc file of meta information, and a doinst.sh file containing scripts to run after the installation completes. You can manually manage these files with commands such as pkgtool, installpkg, removepkg, upgradepkg which are fairly self explanatory. Meta information for these packages are plain text files located in /var/lib/pkgtools/packages. If the package also includes a post-install script, it is stored in /var/lib/pkgtools/scripts, and can be rerun later at will if needed. These tools do not do dependency checking, so in the grand UNIX tradition they allow you to shoot yourself squarely in the foot.
No doubt the concept of no dependency resolution will seem bat crazy, but this isn't so bad in Slackware as you might think. For instance LibreOffice, Zoom and Wine can be installed directly with no extra dependencies. Contrast that to other Linux distros! There are a number of reasons why dependency management is so simple in Slackware. First of all the base install is quite large (~16Gb) and it tries to include all the basic libraries and tools you will likely need in order to compile extra software. Secondly, Slackware tries very hard to be as patch-free and vanilla as possible. In contrast, most Linux distros tend to split sources into multiple packages. That is great for conserving disk space, but terrible for dependency resolution! Finally, many package managers in popular distros will install packages with every optional add on for good measure, even though it's not actually required.
In theory you can freely download 3rd party Slackware binaries and manage them much like a Windows system with the tools described above. pkgs.org is a quick way to find binary packages for Slackware, and other distros, for instance. But I do not recommend managing your packages in this way! It isn't a good idea to install random binaries from the web willy nilly (there is a reason why Windows is so insecure). But if your favorite open source project provides a Slackware package on their website, it is probably safe to install it. Some projects that do provide such packages are wine, vlc and chrome (the last two will just link to Alien Bob's repository).
By the way, the installation DVD contains some useful extra packages that are not installed by default, either for licensing issues or other considerations (You can also get these files from one of the many Slackware mirrors). To install Oracle Java from the DVD for instance, do the following:
# mkdir /usr/src/dvd
# mount /dev/sr0 /mnt/dvd
# cp -r /mnt/dvd/* /usr/src/dvd

# Or use ftp (see above link for alternative mirrors):
# cd /usr/src/dvd
# lftp -c 'open https://mirror.wheel.sk/slackware/slackware64-15.0; mirror'
Grab Java from Oracle's web sites and place it in /usr/src/dvd/extra/java, then we can make a Slackware package and install it:
# cd /usr/src/dvd/extra/java
# ./java.SlackBuild jdk-*.tar.gz
# installpkg /tmp/jdk-*.txz
The official "repo" of Slackware is the 1590 packages provided by the installation DVD (plus 214 packages in the extra directory). And Slackware does ship with a tool that lets you manage official packages quite easily; slackpkg. It's a convenient tool for keeping your system up to date. It is also a very useful tool for managing packages on minimal installations (see below). To use slackpkg, first edit /etc/slackpkg/mirrors and uncomment a mirror near you. Pay attention: There are two lists of mirrors in this file, one for the stable Slackware release and one for the current branch. I recommend going with the stable release, the current branch is only suitable for users who don't mind getting their hands dirty! In any case, you must uncomment only one of these mirrors. After fiddling with the mirror list, you want to run slackpkg update gpg to update the gpg keys for your mirror (unless something odd happens to your mirror, you only need to run that command once). You can then issue commands such as slackpkg install/remove/search/info package and so on. For instance, if you somehow managed to completely break Firefox, you can reinstall it like so:
# slackpkg reinstall firefox
If you want to update your system you can do it like this:
# slackpkg update
# slackpkg install-new
# slackpkg upgrade-all
# slackpkg clean-system
# lilo    # update boot loader
If you find this cumbersome like I do, you can write a little script in /root/bin/upgrade with the following content:
#!/bin/sh
for action in update install-new upgrade-all clean-system; do
    slackpkg -dialog=off -batch=on -default_answer=y $action
done

# Uncomment if you have installed the multilib packages
#for action in install upgrade; do
#    slackpkg -dialog=off -batch=on -default_answer=y $action multilib
#done

# Update boot loader, in case a new kernel was installed
lilo
# Comment out the above and uncomment this if you use grub
#grub-mkconfig -o /boot/grub/grub.cfg
Note two important details here: You have to manually update your boot loader if a new kernel was installed, Slackware does not do that for you! (of course, feel free to automate that, as we have done here) Second, slackpkg clean-system will remove any package that's not part of the official list, such as any packages from SlackBuilds.org, unless you manually edit /etc/slackpkg/blacklist, and tell it to ignore such packages.
After you have made this script executable (ei. chmod +x /root/bin/upgrade), you can simply upgrade your system with this new command. This will not update 3rd party addons however. We will discuss that later, but for now it's enough to know that slackpkg works well if you don't need to manage much more then the official packages.
You can also use slackpkg to upgrade to a new Slackware release by first updating /etc/slackpkg/mirror to point to the new release repo, and then run the above commands. Note however that upgrading from one Slackware release to the next is rarely just a question of upgrading a set of packages. Often you need to run a few manual commands to clean things up as well. The details are described in the UPGRADE.TXT file in the root of the install media. You can either read this from the DVD/ISO or online (eg. http://ftp.slackware.com/pub/slackware/slackware64-15.0/UPGRADE.TXT for instructions on upgrading from version 14.2 to 15.0).
As mentioned, by default slackpkg will only manage official Slackware packages, but there is a 3rd party extension to it, appropriately named slackpkg+, that will allow you to add 3rd party repos. Alien Bob's repositories for multilib packages, and other extensions are popular examples. To install VLC, LibreOffice and Chrome from Alien Bob for instance, download the slackpkg+ binary and run:
$ su -
# installpkg /home/myuser/Downloads/slackpkg+*.txz
# nano /etc/slackpkg/slackpkgplus.conf
Enable the alienbob and restricted repositories, and add restricted to PKGS_PRIORITY. Once it's configured to your liking, update slackpkg and use the new repos:
# slackpkg update gpg # only once after adding a repo
# slackpkg update
# slackpkg install openjdk17 libreoffice-25 vlc chromium
You can also create templates of installed packages with slackpkg and then automatically install these on other Slackware machines (provided they too have the necessary repositories enabled). This is especially handy when managing minimal Slackware installations, but be aware that you must sort out dependencies yourself, by running slackpkg info <mypackage> and checking for REQUIRED lines - note though, only LibreOffice in the above list of packages had a dependency! (that said, 3rd party software will assume you have a full standard installation of Slackware). Suppose you had just installed the above packages on a machine, and you wanted to install the exact same packages on another Slackware box, you could do this:
# slackpkg generate-template myprogs
# scp /etc/slackpkg/template/myprogs.template \
> myothermachine.com:/etc/slackpkg/template
# ssh myothermachine.com
# slackpkg install-template myprogs
PS: Read Alien Bob's multilib instructions if you want 32-bit support on Slackware64.
Finally, it is possible to edit /etc/slackpkg/mirrors and enable a current repo. You can then do the upgrade routine to always run the development branch of Slackware, essentially turning it into a rolling release. But beware! You need to stay on top of things if you do this. Subscribe to the mailing lists and familiarize yourself with the forums. Also note that the SlackBuilds.org community repo assumes a stable release. You can enable the unsupported current branch in sbopkg (choose Utilities -> Repository), but you should expect occasional breakage if you do! (as mentioned above, flatpak and AppImage's are convenient)
For new users I strongly recommend that you do a full installation of Slackware. The installer does allow you to choose what categories of software you want to install, and even cherry pick which packages, but if you do this you are on your own! The installer will not protest if you set up a system with no kernel, or KDE with no Qt. In true UNIX fashion, Slackware gives you just enough rope to hang yourself, then adds some more for good measure. Not only is a custom installation perilous, but usually pointless. If you want to reduce memory footprint or create a snappier system, choice of application habits is a better way to go. Removing packages during installation will only reduce disk usage, but nowadays you'd be hard pressed to even find a disk labeled "Gb" rather then "Tb". These stats are all taken from a default installation of Slackware for instance:
| Environment | Memory | Startup |
| KDE+SDDM | 500Mb | 2m 45s |
| Xfce | 400Mb | 50s |
| Fluxbox | 100Mb | 30s |
| TTY | 100Mb | 25s |
Having that said, if disk space is critical, you can do some minor tweaks during installation without too much danger. For example, the categories E, F, K, KDE, T, TCL, XFCE and Y can all be safely unchecked, if you aren't planning on using Emacs, reading obsolete docs, recompiling the kernel, using KDE, LaTeX, Tcl, Xfce or playing NetHack. (keep either KDE or Xfce if you need a desktop environment!). If you are planning on running a server only, you can also safely uncheck X and XAP. Let's see how much we save by doing so:
| Installation | Time | Disk | Packages |
| Full Installation | 20m | 16Gb | 1590 |
| Xfce Desktop | 12m | 11Gb | 1208 |
| Server | 8m | 8Gb | 810 |
Be sure to edit /etc/slackpkg/blacklist, and add the categories you have excluded, otherwise a slackpkg install-new command will reinstall them! You can trim down the system further by excluding big apps that you don't need. Some suggestions you might consider are: ap/hplip, ap/mariadb, d/llvm, d/rust, l/glibc-i18n, l/qt5, xap/audacious, xap/gimp, xap/mozilla-firefox, xap/mozilla-thunderbird, xap/seamonkey, xap/xpdf, and x/noto-cjk-fonts-ttf.
Don't blindly delete these - consider if you need them; Do you need all the bigwig applications firefox, thunderbird, seamonkey and gimp? Do you need Qt if you didn't install KDE? (if you drop Qt, you cannot use KDE apps or xpdf and audacious - other packages from SlackBuilds.org may also require Qt) Do you really need the internationalization that noto-cjk-fonts-ttf and glibc-i18n provide, or do you only use English? You likely don't need mariadb or hplip unless you're running a server or use an HP printer. Finally, rust and llvm are huge packages that you likely don't need if you aren't working on serious development projects.
In total, excluding these packages will reduce disk space by 3.5 Gb. You can probably shave off about Gb or so by going to /lib/firmware, and deleting directories you don't need. Again, be careful! Only delete /lib/firmware/nvidia if the machine doesn't have an Nvidia graphics card! We can shave off yet another Gb deleting /usr/doc/*, /usr/share/gtk-doc and all the directories in /usr/share/locale except the ones we need. (eg. keep C, en and en_US if you're an English man in New York*) With such rigorous pruning, Slackware will use about 5 Gb with X11, and about 4 Gb without it. After you have installed the system without the packages you don't need, edit /etc/slackpkg/blacklist to exclude these as well, so that subsequent updates does not reinstall them. (we also need to exclude kernel-firmware to preserve our modifications) If you have excluded all the categories and individual packages suggested here, your /etc/slackpkg/blacklist should look something like this:
# excluded categories
e/
f/
k/
kde/
t/
tcl/
xfce/
y/

# excluded packages (regex allowed)
hplip
mariadb
llvm
rust
glibc-i18n
qt5
audacious
gimp
mozilla*
seamonkey
xpdf
noto-cjk-fonts-ttf
kernel-firmware

# ignore SlackBuilds.org extensions
[0-9]+_SBo
We can go much lighter then this, but be careful! Linuxquestions.org has a good, but somewhat dated Slackware-Minimal Install guide. My recommendation to start with though, is to install everything in A except grub, kernel-generic, kernel-modules and kernel-firmware. With that setup we'll be using lilo and kernel-huge to boot. It may seem counter intuitive, but as far as conserving disk space is concerned, it is much lighter to use the huge static kernel, rather then a generic kernel + dynamic modules. We also need diffutils and slackpkg in AP, glibc and libunistring in L and dhcpcd, gnupg, iputils, net-tools, network-scripts, openssh and wget in N. With that in place we have a very bare bones Slackware system that can connect to the network and download extra packages with slackpkg. Let's compare our minimal Slackware installation with other light operating systems:
Update: kernel-huge and kernel-modules will be dropped in the upcomming version of Slackware, as the new version of kernel-generic comes precompiled with all the modules. So at a cost of a bigger generic kernel, it should be able to boot just about anything, without requiring a traditional initrd.
| Installation | Time | Disk | Packages | Memory | Startup |
| Minimal Slackware | 10m | 0.3Gb | 132 | 55Mb | 20s |
| Debian Xfce | 30m | 3.1Gb | n/a | 300Mb | 25s |
| Debian Base | 12m | 1.2Gb | n/a | 50Mb | 20s |
| Alpine Base | 4m | 0.8Gb | n/a | 50Mb | 25s |
| OpenBSD FVWM | 3m 30s | 1.7Gb | n/a | 90Mb | 30s |
| OpenBSD Base | 3m 30s | 0.9Gb | n/a | 30Mb | 30s |
As you can see, Slackware is able to compete with the best of them. The long 10 minute install time includes the tedious work of unchecking nearly all of the packages in the AP, L and N categories. If we wrote a tagfile for this, it would only take a couple of minutes. But I reiterate: Beginners really should go with a default installation. If you mess with the installer like this, you need to know what you are doing!
Every so often you may find that you want to install a weird application that is not included in the repo, this is especially true for Slackware. In such cases you may need to compile the software manually. This usually involved the following steps:
These will usually be something like:
$ ./configure
$ make
$ sudo make install
You will probably note the number of conditionals in the above instructions, usually, or similar, something like... This is because there are a vast number of ways to make and install software on Linux. The quality of the program in question and the install instructions that are provided vary greatly. Additionally sorting out dependency issues by hand and ironing out edge case compatibility problems, is tedious to say the least. The main purpose of a package manager is to take care of all this mess, and lull the casual user into a false sense of security.
In spite of the pain however, knowing how to compile software is a useful skill set to have. This process is not easy in any distro, but it is significantly easier in Slackware then most. For one, distros with large binary repositories, such as Debian, will usually split a package into a default version for users and a -dev version for developers. So if you want to compile something that depends on ncurses for instance, having ncurses-base in Debian is not enough. You need to install the libcunit1-ncurses-dev package, and probably a few others as well. Needless to say this naming convention is entirely different in Red Hat, and God forbid that you need to adjust one of these packages with a non-standard compile option!
In Slackware the packages are straight from upstream, including everything you need for compilation. Whereas the Debian repo has some 30 plus ncurses packages, Slackware has only one. It is remarkably easy to create custom Slackware binaries or adjust existing ones. Lets illustrate how with a couple of examples:
Since there is finally a modern Slackware release out after so many years, let's celebrate by installing a modern desktop; CDE. A quick search on SlackBuilds.org however reveals no CDE package. So it looks like we'll need to build it ourselves:
$ cd $HOME/src
$ git clone git://git.code.sf.net/p/cdesktopenv/code cdesktopenv-code
$ cd cdesktopenv-code/cde
$ less README.md # README says to look at the wiki:
$ firefox https://sourceforge.net/p/cdesktopenv/wiki/Slackware

# Follow the wiki suggestions:
$ su -
# cd /usr/lib64/locale
# ln -s de_DE de_DE.ISO-8859-1
# ln -s es_ES es_ES.ISO-8859-1
# ln -s fr_FR fr_FR.ISO-8859-1
# ln -s it_IT it_IT.ISO-8859-1
# ln -s /bin/gawk /bin/nawk
# chmod +x /etc/rc.d/rc.nfsd # wiki says rc.rpc, that's wrong!

# We can now install CDE:
$ ./autogen.sh
$ ./configure
$ make
# su -
# mkdir /tmp/cde
# cd /home/<myuser>/src/cdesktopenv-code/cde
# make install DESTDIR=/tmp/cde
# cd /tmp/cde
# makepkg -l y -c n /tmp/cde.tgz
# installpkg /tmp/cde.tgz

# The CDE config files should be edited in /etc:
# mkdir /etc/dt
# cp -r /usr/dt/app-defaults /usr/dt/appconfig /usr/dt/config /etc/dt

# Lets add the launcher to standard locations:
# cp /usr/dt/bin/Xsession /etc/X11/xinit/xinitrc.cde
# cat <<eof > /usr/share/xsessions/cde.desktop
[Desktop Entry]
Version=1.0
Name=CDE
Comment=Use this session to run CDE as your desktop environment
Exec=/etc/X11/xinit/xinitrc.cde
Icon=
Type=Application
DesktopNames=CDE
eof

# Finally, we may want to boot directly into the CDE login manager,
# change these lines in /etc/inittab:
id:3:initdefault:
x1:4:respawn:/etc/rc.d/rc.4
# to:
id:4:initdefault:
x1:4:respawn:/usr/dt/bin/dtlogin
If we had dropped the four underscored lines, and just run sudo make install, the program would have been compiled and installed in the normal way. But by doing the underlined steps here, we have instead create a Slackware package in /tmp/cde.tgz. With such a file in place, root can:
The advantage of installing CDE as a package is that the Slackware package manager is now aware of it. It is easy to remove or upgrade it (especially if we have a build script that automates this job - keep reading), and it is very easy to share this package with other machines. You'll note that CDE has zero dependencies on a standard Slackware installation. For other packages you may have to hunt for dependencies on SlackBuilds.org, and of course you will probably run into a few issues along the way. In fact our CDE installation wasn't perfectly smooth; the desktop calendar requires the rpc.cmsd background daemon. We can start that up manually simply by running /usr/dt/bin/rpc.cmsd & as root, but we really should write a proper init script for that. Getting the Mail and Printer apps to work however is a lost cause. Also, we should tweak /etc/inetd.conf and /etc/hosts to conform to some CDE expectations, and enable the inetd daemon (ei. chmod +x /etc/rc.d/rc.inetd && /etc/rc.d/rc.inetd start). But these configurations are not strictly necessary, and so we have just ignored them for the sake of simplicity.
PS: Not all source packages have a DESTDIR option in their Makefiles. Let's look at one such example, the colorful Brogue roguelike, which also is not available in the community repo:
$ cd $HOME/src
$ git clone https://github.com/tmewett/BrogueCE
$ cd BrogueCE
$ less README.md
$ make bin/brogue
$ mkdir -p /tmp/brogue/home/<myuser>/games/brogue
$ mkdir -p /tmp/brogue/home/<myuser>/bin
$ cp -r bin/* /tmp/brogue/home/<myuser>/games/brogue
$ cat <<\eof > /tmp/brogue/home/<myuser>/bin/brogue
#!/bin/sh
cd $HOME/games/brogue
exec ./brogue $*
eof
$ chmod +x /tmp/brogue/home/<myuser>/bin/brogue
$ cd /tmp/brogue
$ sudo /sbin/makepkg -l y -c n /tmp/brogue.tgz
$ sudo /sbin/installpkg /tmp/brogue.tgz
Our roguelike game is very easy to install, so much so that it causes certain problems for us. By default it assumes that your user, and only your user, wants to install the executable along with support files in the bin directory of the source tree. Clearly we need to wrestle a bit with the sources here if we need to make a proper Slackware package, but we can make a really sloppy package easily enough. The above "package" will just install the brogue game in ~/games/brogue, and a convenient launch script in ~/bin/brogue (assuming naturally that $HOME/bin is in your $PATH).* It probably isn't worth the bother of making a personal package like this, unless you happen to have many Slackware boxes that only you use. Still, I hope this hackish example illustrates how flexible and easy package management can be in Slackware. For example, it's easy enough to make a personal package that installs your user to a Slackware system with all your essential dotfiles and other necessities.
The above examples are quick and dirty ways to make Slackware binaries, the official binaries are generated by a shell script that basically follows these steps, but needs to take care of some further details such as figuring out what architecture you are running and which version you are building. It also has a few conventions, all packages are built in /tmp/package-name and the resulting binaries are placed in /tmp, and so on. If you want to submit a build script to SlackBuilds.org, or if you want to make adjustments to packages that come with Slackware you should familiarize yourself on how to write SlackBuild scripts.
Now suppose you need to adjust an application in Slackware. For instance, the cacaview image viewer has been compiled with the --disable-imlib2 option. This makes sense since Slackware does not include imlib2 by default. I however, always install this library since it's a dependency for some other programs I need, and without imlib2 support cacaview cannot open popular image formats such as PNG and JPEG. Well, how do I change this application?
First we need to find out which package cacaview was installed from. A quick grep cacaview /var/lib/pkgtool/packages/* reveals that it was installed with the libcaca package. You can get the source code from one of the Slackware mirrors (eg. mirrors.slackware.com/slackware/slackware64-15.0/source/l/libcaca), and put the files in $HOME/src/libcaca. Now to customize and install the application:
$ su -
# cd /home/<myuser>/src/libcaca
# nano libcaca.SlackBuild

# change --disable-imlib2 to --enable-imlib2
# PS: remember to install imlib2 first!

# BUILD=12 ./libcaca.SlackBuild
# upgradepkg /tmp/libcaca*
That's it, you now have imlib2 support in your caca applications! Note the BUILD=12 statement, you can adjust the VERSION or BUILD variables manually. The version of libcaca that I was altering was version 0.99.beta19, build 11. If I downloaded a later version of the source code, say 1.0, I could run VERSION=1.0 BUILD=1 ./libcaca.SlackBuild, if this worked I could then edit the SlackBuild and set these values permanently. However we were just rebuilding with different compile options, so we only incremented the BUILD number.
PS: If you make a habit of customizing the standard packages, or if you make a lot of packages yourself, you should probably have a fixed place to put your files. I will not dictate how you should organize yourself, but you might find the following suggestions helpful: I usually place temporary source code that I am compiling in $HOME/src/name, my SlackBuilds in $HOME/pkg/mysbo/name, any source code archives in $HOME/pkg/mysbo/archive, and my binary packages in $HOME/pkg/myrepo. I have installed slackpkg+, and in my /etc/slackpkg/slackpkgplus.conf configuration I have enabled a local repository: MIRRORPLUS['myrepo']=dir://home/<myuser>/pkg/myrepo, and added [0-9]+_dan and [0-9]+_SBo to /etc/slackpkg/blacklist, so that my custom/SlackBuilds.org packages aren't accidentally removed by a system update. This local repository is also added to PKGS_PRIORITY so that my custom packages will always take precedence over official ones.
The above CDE package worked quite well, so I would like to write a proper SlackBuild for it, maybe even submit it to SlackBuilds.org. But first, we must write it as a real SlackBuild. Don't worry though, the hardest part is getting a package compiled in the first place, once that's done the rest is mere housekeeping. (housekeeping is important though, so install sbo-maintainer-tools and run sbolint in your SlackBuild directory and sbopkglint on your compiled packages to check that all is well before publishing it!) The first order of business is to get a proper version of CDE, and here we hit our first snag. Surprisingly, the last official 2.4.0 version of CDE from SourceForge does not include the resources nor the documentation needed to actually build the code. As far as I can tell from a cursory look at things, compiling from a git dump is the only way to make this work. This is very sloppy release engineering that is all too common nowadays. We can write a SlackBuild that builds directly from GitHub sources of course, but this is not ideal, since it's hard to track versions and verify checksums. Anyway, the first thing we need to write is a plain text README file, which should contain a quick summary of the package, important instructions and dependency issues, as needed. SlackBuilds.org also requires an info file with important meta information, such as program name, version, homepage, download link, md5sum, required dependencies, and your contact information. We'll also add an xsession file for CDE and an init script for the rpc.cmsd service (and here we meet our second snag, more on that later):
$ mkdir -p ~/pkg/mysbo/cde
$ cd ~/pkg/mysbo/cde
$ cat <<eof > README
The Common Desktop Environment was created by a collaboration of Sun, HP,
IBM, DEC, SCO, Fujitsu and Hitachi. It was developed during the 90's and
was the de facto standard UNIX desktop on commercial systems until the
early 2000's. Originally CDE was proprietary software, but it was finally
licensed under LGPL in 2012.

This SlackBuild uses the latest GitHub sources of CDE.

PS: The rc.nfsd, rc.initd and rc.cmsd daemons in /etc/rc.d should be
running for CDE to work right (rc.nfsd is REQUIRED).

PPS: There is a bug in rc.cmsd that prevents it from starting up during
boot, so you'll need to manually start it.

Your /etc/hosts file should also contain the following lines:

  127.0.0.1	<myname> <myname>.<mydomain>
  ::1		<myname> <myname>.<mydomain>

and /etc/inetd.conf should contain these lines:

  cmsd/2-5 dgram rpc/udp4 wait root /usr/dt/bin/rpc.cmsd rpc.cmsd
  ttdbserver/1 stream rpc/tcp4 wait root /usr/dt/bin/rpc.ttdbserver \
  rpc.ttdbserver

If you want to use the CDE login manager, change

  x1:4:respawn:/etc/rc.d/rc.4

in /etc/inittab to

  x1:4:respawn:/usr/dt/bin/dtlogin
eof
$ cat <<eof > cde.info
PRGNAM="cde"
VERSION="2.4.0"
HOMEPAGE="https://sourceforge.net/projects/cdesktopenv/"
DOWNLOAD=""		# missing since we're cloning from git
MD5SUM=""		# missing since we're cloning from git
DOWNLOAD_x86_64=""
MD5SUM_x86_64=""
REQUIRES=""
MAINTAINER="Dan-Simon Myrland"
EMAIL="dansimon@radiotube.org"
eof
$ cat <<eof > cde.desktop
[Desktop Entry]
Version=1.0
Name=CDE
Comment=Use this session to run CDE as your desktop environment
Exec=/etc/X11/xinit/xinitrc.cde
Icon=
Type=Application
DesktopNames=CDE
eof
$ cat <<\eof > rc.cmsd # eof is escaped, to make $1 etc literal
#!/bin/sh
#
# This runs the rpc.cmsd background process needed by CDE.
#
# To enable this service automatically at boot, make this file
# executable:  chmod 755 /etc/rc.d/rc.cmsd
#
# BUG: For some unknown reason this fails to start during boot.
#

cmsd_start() {
  /usr/dt/bin/rpc.cmsd &
}

cmsd_stop() {
  killall rpc.cmsd
}

cmsd_restart() {
  cmsd_stop
  sleep 2
  cmsd_start
}

case "$1" in
'start')
  cmsd_start
  ;;
'stop')
  cmsd_stop
  ;;
'restart')
  cmsd_restart
  ;;
*)
  # Default is "start", for backwards compatibility with previous
  # Slackware versions. This may change to a 'usage' error someday.
  cmsd_start
esac
Now, let's add some commands to run in doinst.sh:
$ cat <<eof > doinst.sh
ln -s /usr/lib64/locale/de_DE /usr/lib64/locale/de_DE.ISO-8859-1
ln -s /usr/lib64/locale/es_ES /usr/lib64/locale/es_ES.ISO-8859-1
ln -s /usr/lib64/locale/fr_FR /usr/lib64/locale/fr_FR.ISO-8859-1
ln -s /usr/lib64/locale/it_IT /usr/lib64/locale/it_IT.ISO-8859-1
ln -s /bin/gawk /bin/nawk
These commands will be executed after the files have been installed on the system. The README file is included for the benefit of SlackBuilds.org users, the Slackware package manager itself (pkgtool(8), and related commands) needs to have the description in a painfully formatted way, the easiest method of writing that is to download slackdesc, and let it help you generate a proper slack-desc (you don't need to add sysadmin/dependency issues here, just a short description):
$ slackdesc "cde" "2.4.0" "CDE common desktop environment" "The Common \
Desktop Environment was created by a collaboration of Sun, HP, IBM, DEC, \
SCO, Fujitsu and Hitachi. It was developed during the 90's and was the de \
facto standard UNIX desktop on commercial systems until the early 2000's. \
Originally CDE was proprietary software, but it was finally licensed \
under LGPL in 2012." "https://sourceforge.net/projects/cdesktopenv" \
> slack-desc

$ cat slack-desc
cde: cde 2.4.0 CDE common desktop environment
cde:
cde: The Common Desktop Environment was created by a collaboration of Sun, HP,
cde: IBM, DEC, SCO, Fujitsu and Hitachi. It was developed during the 90's and
cde: was the de facto standard UNIX desktop on commercial systems until the
cde: early 2000's. Originally CDE was proprietary software, but it was finally
cde: licensed under LGPL in 2012.
cde:
cde:
cde:
cde: https://sourceforge.net/projects/cdesktopenv
Now that all our files are in order lets write the actual build script, open cde.SlackBuild in your favorite editor and write:
#!/bin/sh

# We'll fist add a standard header and a simple BSD Zero Clause License

# Slackware build script for CDE
#
# Copyright (C) 2022 by Dan-Simon Myrland <dansimon@radiotube.org>
#
# Permission to use, copy, modify and/or distribute this software for any
# purpose with or without fee is hereby granted.
#
# THE SOFTWARE IS PROVIDED "AS IS" AND THE AUTHOR DISCLAIMS ALL
# WARRANTIES WITH REGARD TO THIS SOFTWARE INCLUDING ALL IMPLIED
# WARRANTIES OF MERCHANTABILITY AND FITNESS. IN NO EVENT SHALL THE AUTHOR
# BE FOR ANY SPECIAL, DIRECT, INDIRECT, OR CONSEQUENTIAL DAMAGES OR ANY
# DAMAGES WHATSOEVER RESULTING FROM LOSS OF USE, DATA OR PROFITS, WHETHER
# IN AN ACTION OF CONTRACT, NEGLIGENCE OR OTHER TORTUOUS ACTION, ARISING
# OUT OF OR IN CONNECTION WITH THE USE OR PERFORMANCE OF THIS SOFTWARE.

# Next we want to define some common defaults, program name, version,
# architecture and compiler flags and so on.

PRGNAM=cde
VERSION=${VERSION:-2.4.0}
GITURI=${GITURI:-https://git.code.sf.net/p/cdesktopenv/code}
BRANCH=${BRANCH:-cdesktopenv-code}
GITTAG=${GITTAG:-2.4.0-636-g75c377065}
BUILD=${BUILD:-1}
TAG=${TAG:-_SBo}

if [ -z "$ARCH" ]; then
  case "$( uname -m )" in
    i?86) ARCH=i486 ;;
    arm*) ARCH=arm  ;;
       *) ARCH=$( uname -m ) ;;
  esac
fi

CWD=$(pwd)
TMP=${TMP:-/tmp/SBo}
PKG=$TMP/package-$PRGNAM
OUTPUT=${OUTPUT:-/tmp}

if [ "$ARCH" = "i486" ]; then
  SLKCFLAGS="-O2 -march=i486 -mtune=i686"
  LIBDIRSUFFIX=""
elif [ "$ARCH" = "i686" ]; then
  SLKCFLAGS="-O2 -march=i686 -mtune=i686"
  LIBDIRSUFFIX=""
elif [ "$ARCH" = "x86_64" ]; then
  SLKCFLAGS="-O2 -fPIC"
  LIBDIRSUFFIX="64"
else
  SLKCFLAGS="-O2"
  LIBDIRSUFFIX=""
fi

# Let's be paranoid and exit if anything goes wrong
set -e

# OK, we're ready to actually build the package now. Clean out old
# files and create build directories if necessary, also make sure file
# permissions are correct.

rm -rf $PKG
mkdir -p $TMP $PKG $OUTPUT
cd $TMP
rm -rf ${BRANCH}

# Normally we want to download a tarball with a proper release version,
# but in this case we will just checkout the source from GitHub.

git clone ${GITURI} ${BRANCH} \
  && cd ${BRANCH} \
  && git checkout ${GITTAG} \
  && chown -R root:root . \
  && chmod -R u+w,go+r-w,a-s . \
  && cd $PRGNAM

./autogen.sh
CFLAGS="$SLKCFLAGS" \
CXXFLAGS="$SLKCFLAGS" \
  ./configure
make
make install DESTDIR=$PKG

# Lets try to conserve space if we can
find $PKG -print0 | xargs -0 file | grep -e "executable" \
  -e "shared object" | grep ELF | cut -f 1 -d : | \
  xargs strip --strip-unneeded 2> /dev/null || true

# Normally in a SlackBuild, you move any manpages to $PKG/usr/man, and
# gzip them to conserve space, but in this case, I will leave the CDE
# manpages in $PKG/usr/dt/man alone. It makes sense that this big
# desktop from the past resides safely in its own private den. But we
# do want to create some extra system files:

mkdir -p $PKG/etc/rc.d
cat $CWD/rc.cmsd > $PKG/etc/rc.d/rc.cmsd
chmod 644 $PKG/etc/rc.d/rc.cmsd
mkdir -p $PKG/etc/dt
cp -r $PKG/usr/dt/app-defaults $PKG/usr/dt/appconfig $PKG/usr/dt/config \
  $PKG/etc/dt
mkdir -p $PKG/etc/X11/xinit
cp $PKG/usr/dt/bin/Xsession $PKG/etc/X11/xinit/xinitrc.cde
mkdir -p $PKG/usr/share/xsession
cat $CWD/cde.desktop > $PKG/usr/share/xsession/cde.desktop

# Copy over any relevant documentation
mkdir -p $PKG/usr/doc/$PRGNAM-$VERSION
cp -a \
  CONTRIBUTORS COPYING HISTORY README.md copyright \
  $PKG/usr/doc/$PRGNAM-$VERSION
cat $CWD/$PRGNAM.SlackBuild > $PKG/usr/doc/$PRGNAM-$VERSION/$PRGNAM.SlackBuild

# Add the meta files
mkdir -p $PKG/install
cat $CWD/slack-desc > $PKG/install/slack-desc
cat $CWD/doinst.sh > $PKG/install/doinst.sh

# And then finally we can create the Slackware binary
cd $PKG
/sbin/makepkg -l y -c n $OUTPUT/$PRGNAM-$VERSION-$ARCH-$BUILD$TAG.${PKGTYPE:-tgz}
With this file in place, we can now create and install our package:
$ su -
# cd /home/<myuser>/pkg/mysbo/cde
# chmod +x cde.SlackBuild
# ./cde.SlackBuild
# installpkg /tmp/cde-*.tgz

# Or, if we have configured slackpkg+ with a custom repo:
# mv /tmp/cde-*.tgz /home/<myuser>/pkg/myrepo
# slackpkg install cde
Our CDE SlackBuild is not ideal. There are a few nagging issues with CDE itself; For some inexplicable reason rpc.cmsd simply refuses to start during boot. This is not a Slackware specific issue, as I have seen the exact same CDE problem in other operating systems. And there are other problems besides. Hopefully the CDE devs will manage to fix some of this in the future, but for now there isn't much we can do about it. Another serious shortcoming is that we don't use a proper version, but just build it straight from GitHub. What we should do in this case is join the CDE mailing list/forum, and pester the developers about good release engineering, and see if we can help them out in any way. Personally I don't have the time and energy for that, but feel free to take this demo SlackBuild and see if you can make a proper SlackBuilds.org submission (go ahead and change the license/author too if you want, you have my permission). In any event, I do hope that it was educational to go through this process, we even learned a thing or two about the Slackware init system!
Update: It seems I have more free time then I realize, as I have submitted a SlackBuild for CDE and Brogue. Still, let me know if you see any bugs, or better yet, want to take over the maintenance ;)
PS: Getting a 30 year old desktop to work in the modern world is quite a challenge! It is possible to go in the other direction though; Making a modern desktop look like CDE. That is what the NsCDE developers have done. NsCDE (Not so Common Desktop Environment) is basically FVWM on steroids, and it's quite mind blowing to see what these people have managed to do with it!
If you're new to Linux though you can be forgiven for thinking that the above script is anything but easy, but most of the commands here are just boiler plate. Templates such as this one only need minor tweaking to build something radically different. Also note that there is nothing inherently special about a SlackBuild, it is just a shell script, in fact the only Slackware specific part of our script is makepkg. (our init script conforms to Slackware idioms, but it too is just a shell script with no distro specific commands)
After walking through the process of making a build script above, you'll understand how SlackBuilds.org works. The community sends in their build scripts for approval, and if their submission passes the screening, it's hosted on the site. You can manage these build scripts manually. That is, search for a package on the web site, download and unpack the build script, then download the program source and place it in this directory, run the SlackBuild script, and finally installpkg the resulting binary in /tmp. But the aforementioned sbopkg front end is a much more convenient way of managing these scripts. Just run sbopkg as root, remember to Sync and to check the README's for REQUIRES, and check the dependencies of your dependencies, and so on ad infinitum, and you'll be fine ;)
As mentioned, slackpkg will only update the official Slackware packages (with extensions, it can also update additional repositories), it doesn't update your SlackBuilds.org packages. To do that, run sbopkg, then Sync, then Updates. All available updates will be added to the build queue, Hit Queue, then Process to build them. If you are lucky everything works, but updates can be quirky. Occasionally you'll need to partially, or entirely, rebuild the list of dependencies for the updated packages to compile correctly. (aside for other issues - we're talking about source code here)
If you want something more automatic, you can check out sbotools or slpkg, but you can also automate sbopkg with a simple script. First, we can run sqg -a to generate dependency lists for all SBo packages. Then, we can write something like this:
#!/bin/sh
# sbobuild - build my list of SBo packages
# usage:  sbobuild
# depend: install sbopkg, and run sqg -a first!
# bugs:   you must run this as root

# set some defaults
tmp=/tmp/sbobuild-$$
trap 'rm -f $tmp' 0 1 2 15
rm -f /tmp/*.tgz
bin=/home/myuser/pkg/Sbo
mkdir -p $bin

# curate this list as needed
cat << eof > $tmp
supertux
pingus
supertuxkart
extremetuxracer
neverball
wesnoth
pysolfc
eof

# build packages
for pkg in $(cat $tmp); do
    if [ -f /var/lib/sbopkg/queues/$pkg.sqf ]; then
        pkg=$pkg.sqf
    fi
    sbopkg -e continue -Bki $pkg
done

# save binaries
mv /tmp/*.tgz $bin
rm $tmp
In our script we check if the package has a queue of dependencies, and supply that to sbopkg if it does. (otherwise sbopkg would ask as if we want to install the package or the queue) The -e continue -Bki flags will install the package and its dependencies, unless they are already installed, without asking for confirmation. If an error occurs in the build, it will just jump to the next package and continue the process. Finally, we save our binaries in ~/pkg/SBo, so that it's easy to install these packages on other Slackware machines. (eg. scp buildmonster:~/pkg/SBo . && installpkg *.tgz)
What if you're on board with all the stability and simplicity, but you find the default Breeze Plasma theme for KDE boring. The Dr460nized edition of Garuda Linux looks much cooler, who cares about stability anyway! Is it time for a distro hop..? Well, if you want Slackware to look exactly like Garuda, it will take some doing, but setting a Sweet theme and candy icons in Settings -> System Settings -> Appearance will make your KDE look somewhat reminiscent of that gorgeous Arch spinoff (you may also want to tweak System Settings -> Workspace Behavior -> Desktop Effects). Admittedly, it is a bit clunky to tweak KDE themes like this, but it took me only about 5 minutes to set up each of the following screenshots, despite being a KDE amateur. To illustrate the theming flexibility of KDE, the second screenshot is purposely made to look as retro as possible, using the Irixium theme and NsCDE icons (SE98 icons are a good alternative). I'm sure you can make nicer/fouler themes yourself, or tweak KDE to look and behave like a Windows/Mac clone, if that's your thing. (Xfce too can be tweaked to look and behave like anything)
Slackware will give you software in its default form, but as this example shows it usually takes a minimum of effort to change things up if you prefer. You may of course want something other then KDE or Xfce. The SlackBuilds.org repo contain quite a few window managers and desktops that you can install with sbopkg (or another SlackBuilds.org front end if you prefer), including GNOME, Cutefish, LXQt, Budgie, Enlightenment and Lumina. You'll find Wayland options too, such as Sway and Hyprland. For other desktops, you might need to rely on alternative repositories. You can install Cinnamon or Mate with slackpkg+ for instance, by enabling Willy Sudiarto Raharjo's csb and msb repositories. (eg. run slackpkg install csb after enabling that repo) Frank Honolka has also published packages for Pantheon (repo), and UKUI (repo). Ray-V has published packages for Trinity (repo) and COSMIC (repo) seems to be in the works too. Exactly how maintained and polished these packages are varies, but now that you know how SlackBuild scripts work, feel free to update and fix any issues you encounter ;)
KDE Plasma, and what not, is all Kool and dandy, but as we all know, Tom's Window Manager (or TWM), is the standard X11 desktop. The problem though, is that TWM is crude and ugly! Is it possible to make this ancient relic functional and cool? Well, let's try to make it look a bit more like the ENCOM OS-12 desktop from TRON: Legacy (a documentary about the Linux command line). We'll start by copying the default config file to our home directory; cat /usr/share/X11/twm/system.twmrc > ~/.twmrc. We can read the twm(1) manpage and tweak this file to our liking. TWM is a bit too customizable for it's own good (it later inspired FVWM, which took this insanity a lot further), but after a while of trial and error, our config file may look something like this:
# default behavior
RandomPlacement
WarpCursor
NoRaiseOnResize
NoTitle

# fonts and colors
MenuFont "-adobe-helvetica-bold-r-normal--*-120-*-*-*-*-*-*"
IconFont "-adobe-helvetica-bold-r-normal--*-100-*-*-*-*-*-*"
Color
{
    BorderColor "cyan"
    DefaultBackground "black"
    DefaultForeground "cyan"
    BorderTileBackground "cyan"
    MenuBackground "black"
    MenuForeground "cyan"
    MenuBorderColor "cyan"
    IconBackground "black"
    IconForeground "cyan"
    IconBorderColor "cyan"
}

# mouse and keybindings
Function "move-or-raise" { f.move f.deltastop f.raise }
Function "resize-or-lower" { f.resize f.deltastop f.lower }
Button1 = : root : f.menu "main"
Button1 = m : window|icon : f.function "move-or-raise"
Button2 = m : window|icon : f.iconify
Button3 = m : window|icon : f.function "resize-or-lower"
"F1" = : all : f.zoom
"F2" = : all : f.delete

# menus
menu "main"
{
    "Xterm" f.exec "exec xterm &"
    "Apps" f.menu "apps"
    "" f.nop
    "Delete" f.delete
    "Exit" f.quit
}
menu "apps"
{
    "Firefox" f.exec "exec firefox &"
    "Thunderbird" f.exec "exec thunderbird &"
    "VLC" f.exec "exec vlc &"
    "LibreOffice" f.exec "exec soffice &"
}
Besides setting a cyan theme and app menus, we also configure our TWM window manager to move windows with Alt + left click (Button1 = m), and resize it with Alt + right click (Button3 = m). To bring up the TWM menu, just left click anywhere where there isn't a window (on the root). Next, we need to set a cyan theme for our various applications. For Qt apps, just fire up systemsettings5 and look for a suitable Tron theme (if installation of a theme fails, you can always manually extract the /tmp download in ~/.local/share/plasma/look-and-feel). GTK apps is a bit more messy, you can hunt for themes at Gnome-Look.org, and unpack them in ~/.themes. You can then edit ~/.config/gtk-3.0/settings.ini (or ~/.config/gtk-4.0/settings.ini, maybe even ~/.gtkrc-2.0, depending on what version of GTK the theme it is designed for - you can also install lxappearance for a more graphical approach). For our basic X11 apps though, we need to add some values in ~/.Xresources (search the manpages to get clues on what values can be set):
! Default X settings
*background:		black
*foreground:		cyan
*BorderColor:		cyan

! XClock settings
XClock*hourColor:	cyan
XClock*minuteColor:	cyan
XClock*majorColor:	cyan
!XClock*hands:		cyan ! replace 3 lines above with this on some XClock versions

! XEyes settings
XEyes*outline:		cyan
XEyes*center:		black

! XTerm settings
XTerm*faceName:		Monospace:pixelsize=18
To set TWM as your window manager, either run xwmconfig and choose xinitrc.twm, or manually edit ~/.xinitrc and set exec twm towards the end. You'll also note the /usr/bin/xrdb -merge $sysresources line in this file; you need to run that command (ei. xrdb -merge ~/.Xresources) for your new X settings to take effect. If you need to adjust the background color, you can do so with xsetroot (eg. xsetroot -solid black), or feh (eg. feh --bg-fill wallpaper.png). The example instructions for setting the right keyboard and screen layout, mentioned in the Xorg Configuration section, can also be done with the following commands: setxkbmap us -variant dvorak -option compose:ralt and xrandr --output HDMI-1 --primary --left-of VGA-1 --auto --output VGA-1 --auto. You can add all of this to ~/.xinitrc to make the desktop behave as you want. Of course this all assumes that you login to a text based environment (by setting id:3:initdefault: in /etc/inittab), if you don't, you may need to write an Xsession file for TWM in /usr/share/xsessions/twm.desktop (see Compiling Packages for a hint on how to do this). For some simple login managers (eg. XDM) it will suffice to just ln ~/.xinitrc ~/.xsession however, and it doesn't hurt to run ln ~/.Xresources ~/.Xdefaults either as some X programs expects to find such values there. (the good thing about standards is that there are so many choices)
But if you are the type of person who would like a Tron-like Window Manager, I assume you want to start it from the TTY. Speaking of which, how do we make the TTY use a cyan theme? Well, a simple way would be to add echo -en "\e]P700FFFF" && clear to our ~/.profile ("\e]P700FF00" if you want a green font), it's also a good idea to add source ~/.profile to your ~/.bashrc, so that this theme takes effect in your xterm's too. We could also add the echo line above early in /etc/rc.d/rc.M to make the system use a cyan theme early on in the boot process. To ensure a comprehensive Tron-like terminal theme though, you probably don't want applications to spew out their own colors. Unfortunately, such settings are very application specific. Here are just a few examples you might want to add to your ~/.profile (CDE users might find this useful too):
alias alsamixer='alsamixer -g'
alias ls='ls --color=never'
alias grep='grep --color=never'
alias emacs='emacs --color=never'
alias vim='vim "+syntax off"'
alias lynx='lynx -nocolor'
alias mc='mc -b'
Other programs may require some config tweaking, you can add set-option -ag status-style "bg=cyan" and set-option -ag pane-active-border-style "fg=cyan" to ~/.tmux.conf, and change use_shadow and use_colors in /etc/dialogrc from ON to OFF, in order to make tmux and the various dialog based package management tools in Slackware (eg. pkgtool and sbopkg) conform to our Tron theme.
TWM is limited though, it has no virtual workspaces for instance, so how do we multitask in our Tron-like environment? We can add virtual workspaces to TWM using the vdesk package from SlackBuilds.org, or we can just run run multiple instances of TWM; Log in to TTY2 with Ctrl + F2, then run startx -- :2. Running more then 12 desktops from the TTY is impractical, but we can run TWM from within TWM: Eg. run (Xephyr :3 -screen 1920x1080 &); sleep 1; DISPLAY=:3 twm. (it doesn't matter what ID number you give it as long as it's unique). You can even Alt + middle click this desktop to iconify it (ei. minimize it) to your first TWM desktop, and we can run TWM from within TWM from within TWM, and so on. In practice however, nesting identical window managers like this isn't a good idea, since it causes mouse/key binding conflicts* (running KDE from ratpoison works like a charm though). You can end such nested desktops with pkill Xephyr. You can also enable more TTY's by editing /etc/inittab (more then 24 is possible, but impractical); Find the line that says c6:12345:respawn:/sbin/agetty 38400 tty6 linux. Copy this line and change c6 and tty6 to c8 and tty8 (certain login managers will assume that TTY7 is reserved for the graphical environment so we'll leave it alone). You can repeat this procedure for TTY9-24. To move between TTY13-24, use AltGr* + Fn (eg. AltGr + F1), instead of the left Alt button.
Our crude Tron-like Window Manager isn't nearly as cool as the Holywood ENCOM OS-12;* Not all applications and X11 elements work well with our theme, and we don't have the slick fonts, glow effect or curved window borders seen in the movie. It is possible to create a more convincing illusion in KDE/GNOME of course, but if you want a system wide immersive Tron-like experience from start to finish, it would require massive hacking of the init system, the kernel and a plethora of other applications. As always, following the UNIX principal of worse is better is the wisest course of action. And really, It would probably be best to go with a dull gray theme here. It is more restful for the eyes, and works better with X defaults and colorful terminal apps. Still, I hope this imperfect example might inspire you to make some customizations of your own, and perhaps illustrate that boring old cruft in Linuxland might provide more fun then first impressions would suggest.
Pro tip: Even if you refuse to mess with basic X11 apps out of sheer principal, just setting *background: gray in your ~/.Xresources, is usually enough to make such horrid eyesores look merely plain.
To illustrate what you can do with Slackware I played around with a few desktops and window managers and include some screenshots. I have not included all available desktops, in particular there is a near unlimited amount of lightweight stacking and tiling window managers available for Linux, but I have tried to include a selection that will illustrate the breadth of choices. Of course there is no end to the limit of customizations you can do on most desktops, the examples shown here are just the result of a few minutes of tinkering. I am sure you can produce prettier (or uglier) setups yourself with modest efforts. (If you'd like a more indepth discussion of these desktops, you might find The Window Manager Desktop Guide of interest)
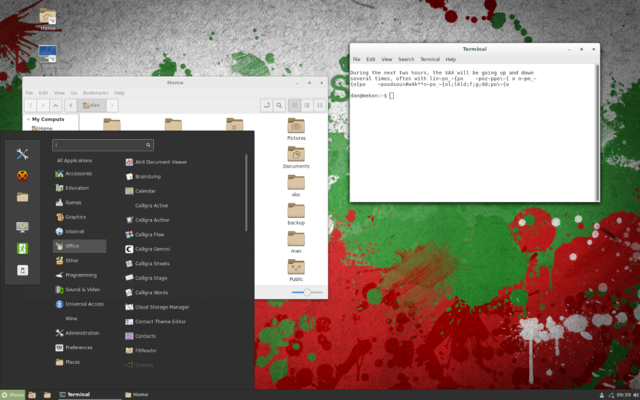
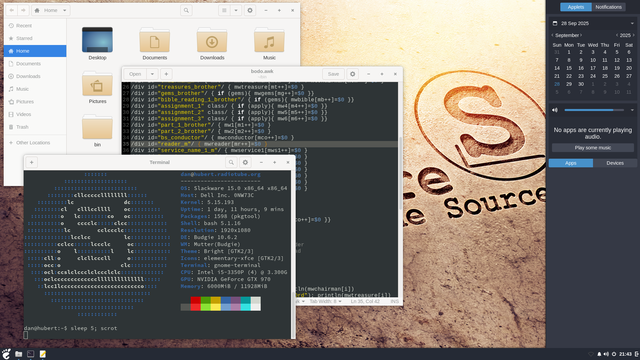
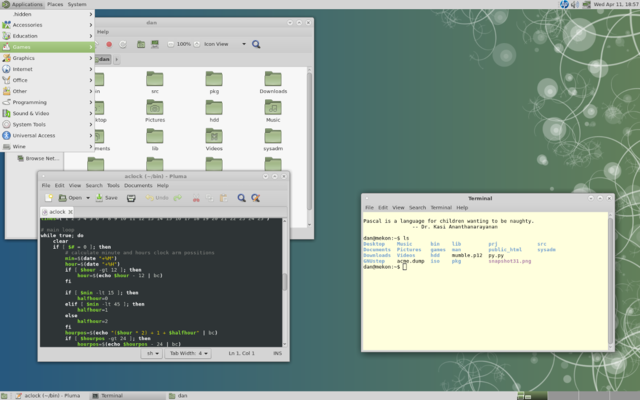
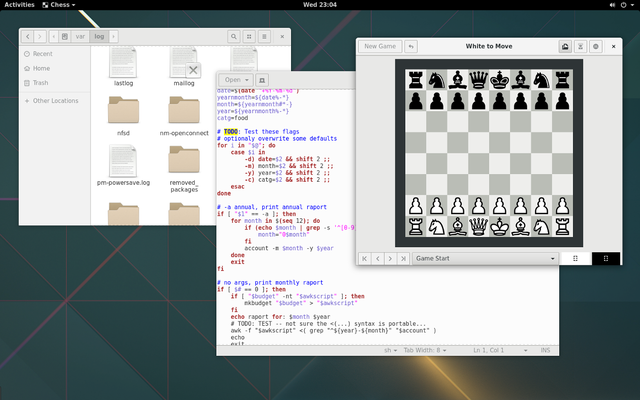

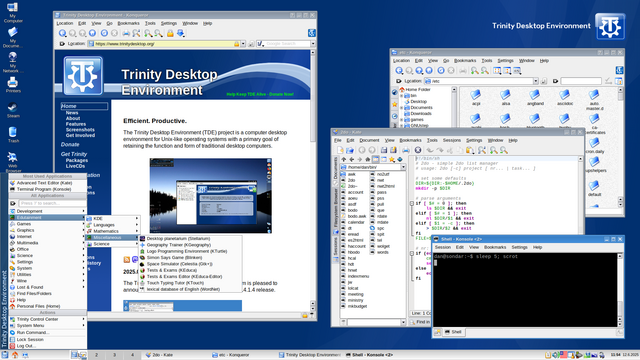
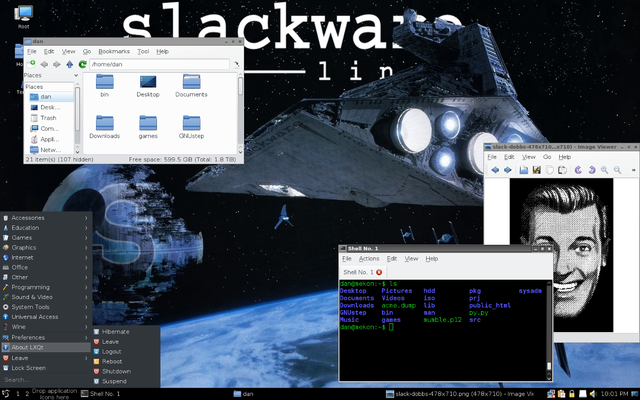
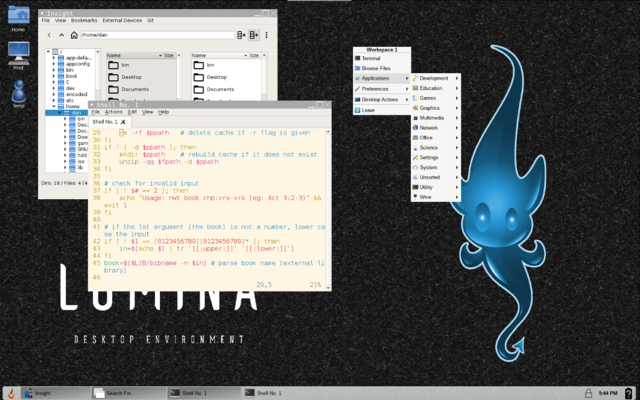
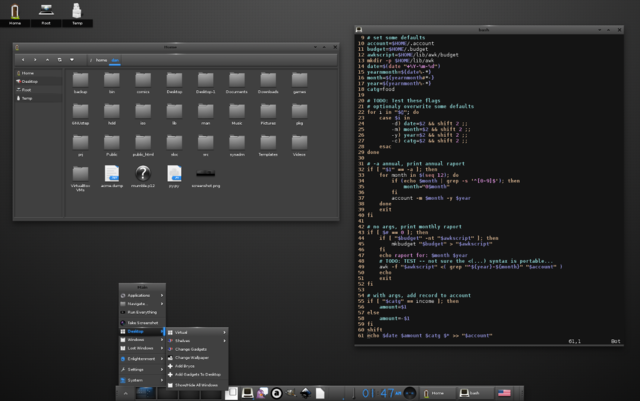
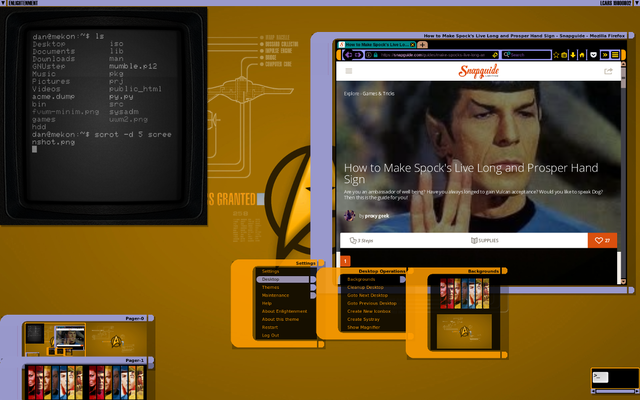
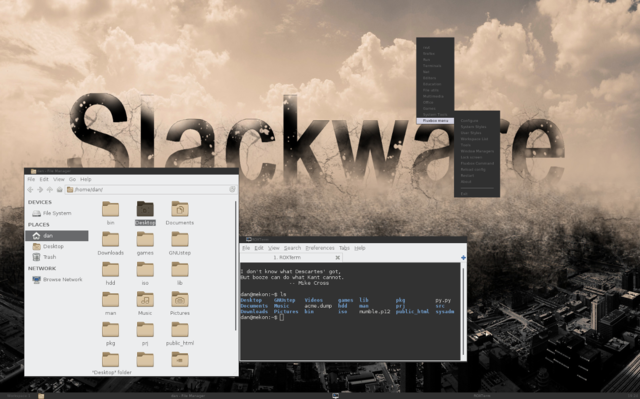
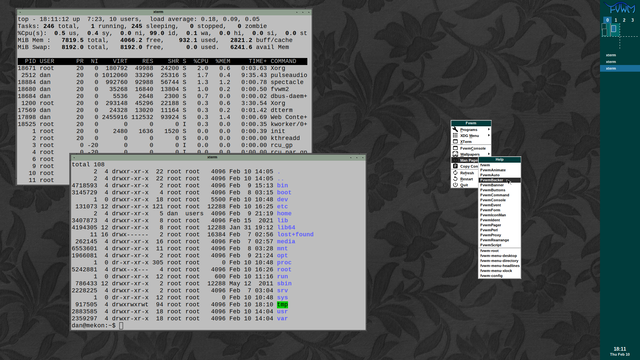
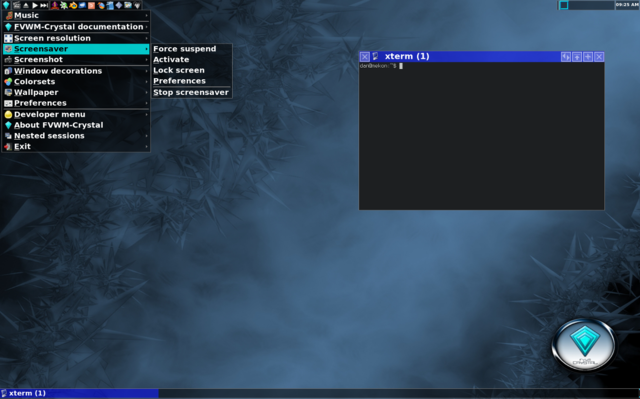
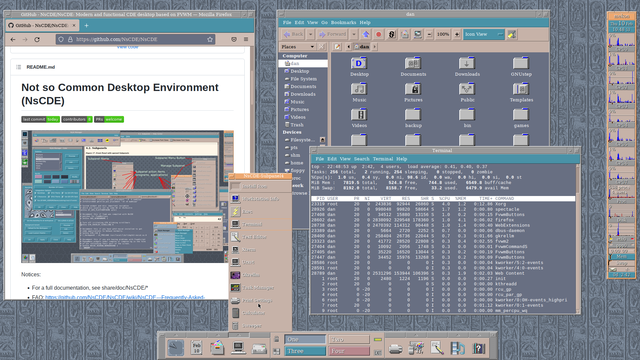
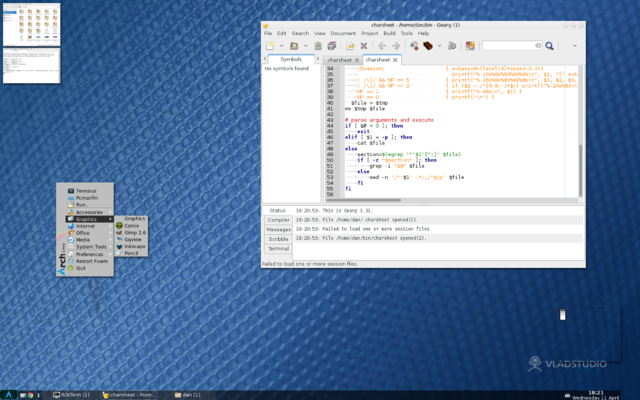
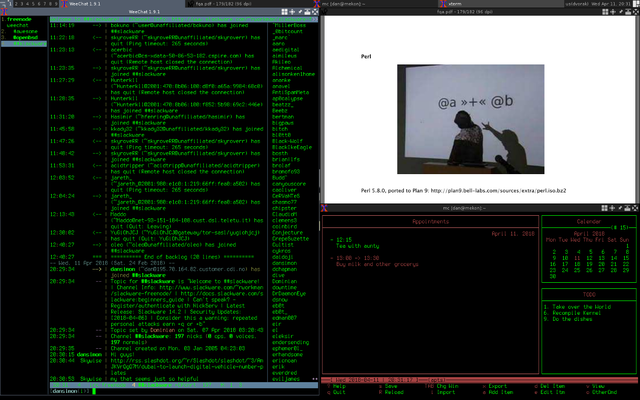
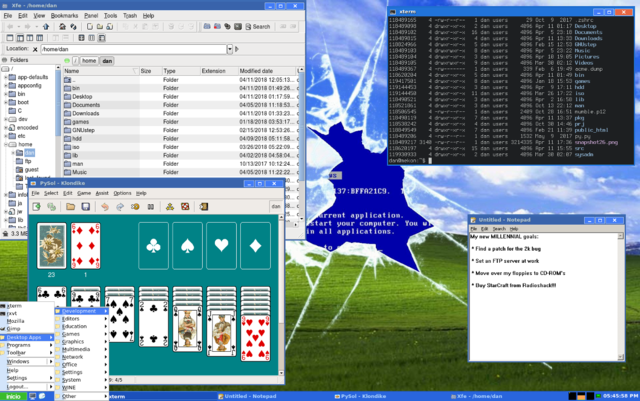
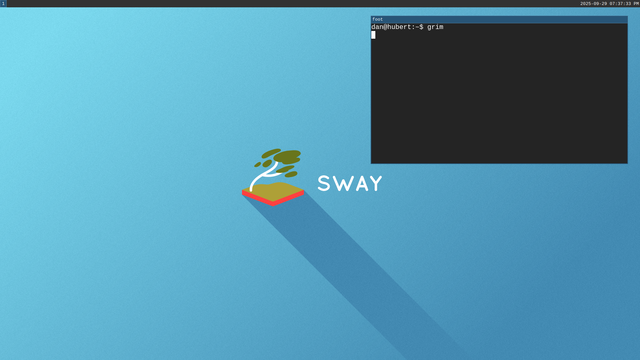
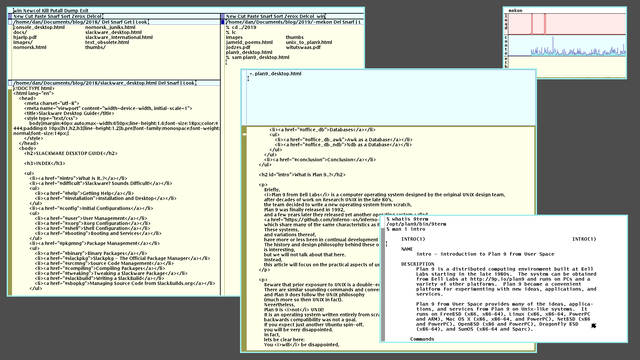
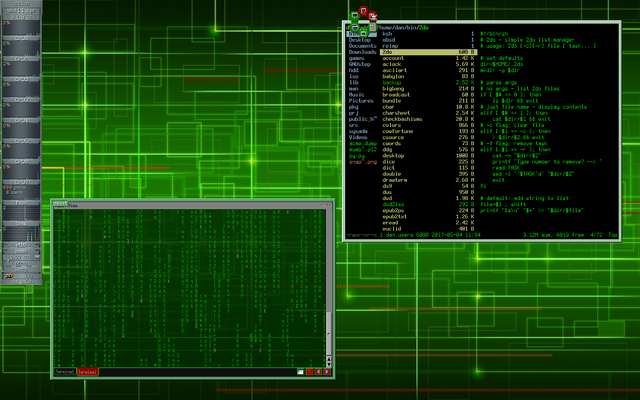
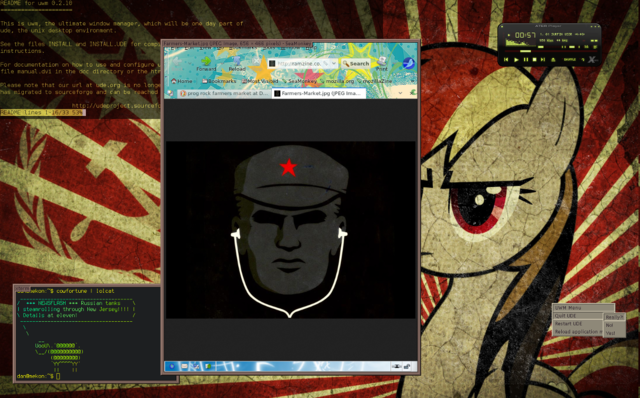
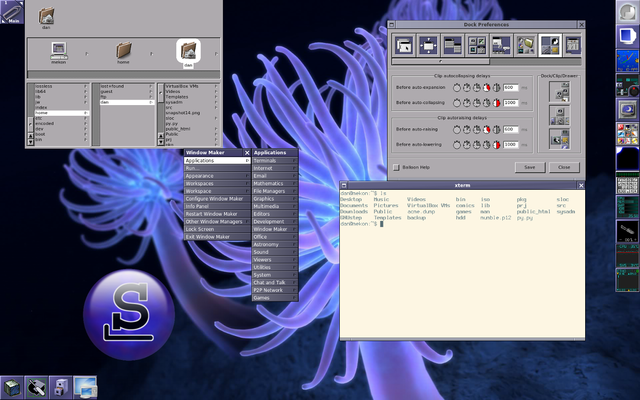
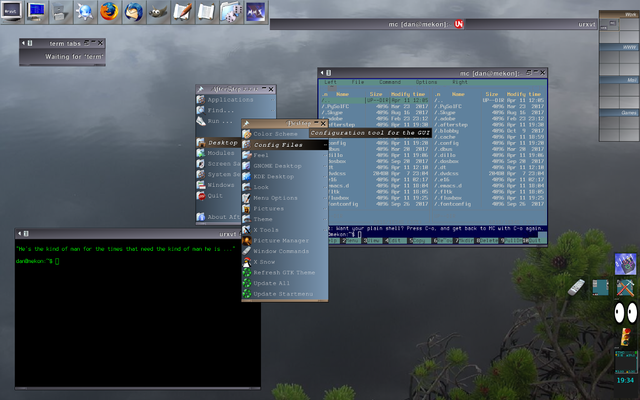
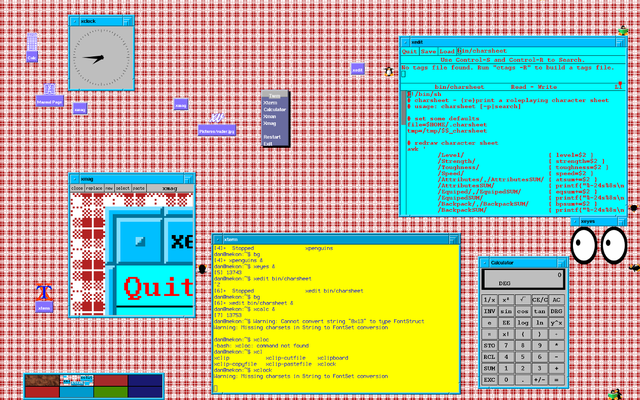
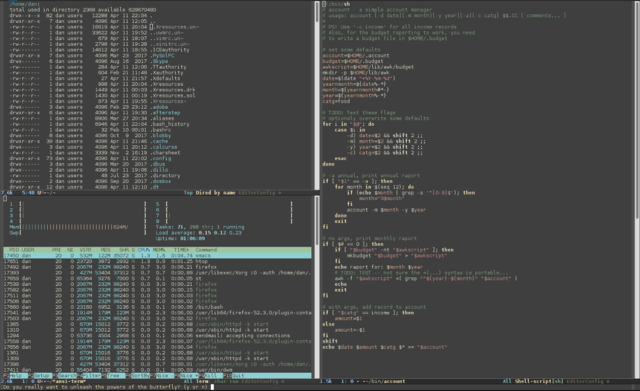

Some might choose a distro simply because of the way it looks, but does that really make sense when it takes 5 minutes to change a desktop theme? How much fun is a cool looking wallpaper on an unreliable system? At the end of the day a Linux distribution is just a collection of software. Firefox 140.3.1esr on Fedora or Gentoo does not have mystical superpowers that Firefox 140.3.1esr on Slackware or Debian lacks.
At the end of the day the Slackware desktop experience is what you make of it. True, it does not have a huge and well tested repository compared to the likes of Debian, but it likely has what you need. There are certainly more slick and smooth distros out there (Void Linux and FreeBSD are two strong competitors if you like the KISS approach), but it's precisely the rough edges in Slackware that makes it interesting; Using it you gradually realize that there isn't a distro there, it's quite literally just a handful of shell scripts that automates installation, compilation and background processes. It drives you to dig deep into the applications themselves and really learn how a Linux system ticks, including all of its ungainly aspects. That said, it's much easier to install and use Slackware then most seem to think. We may have gone a bit overboard with whimsically convoluted examples in this article, but as the Initial Configurations section says, 10 minutes after installation you have a fully functional modern desktop, everything after that is optional tinkering.
Have fun :^)